Look what I made.
Beautiful, isn't it? It's a Cloth Diaper Spraying Bucket, if you didn't already know.
We needed it because I found a set of 18
new gDiapers at a garage sale, for $4. Yes, $4. I think the lady selling them thought they were doll diapers (size 6-10 lbs). I am holding it as my best garage sale find so far, $180 worth of diapers for $4. I snatched them up, and didn't let go until I got to the car!
Anyway, I am really happy about the idea of using cloth on the new baby, but we don't like the idea of "solids" going in the washer machine. Last time we tried cloth diapers I did a lot of "swishing"and hand rinsing. It was too time consuming, and we predictably switched back to disposables. But, after getting such a good deal on these diapers I figured it was finally time to splurge on a
Diaper Sprayer. And, by splurge I mean agonize over spending $50, and wonder if I should try to make a
DIY sprayer.
I spent a lot of time looking online at different sprayers, and my favorite was
The Potty Pail/Sprayer combo. I was all set to buy, then I realized that
I didn't need a sprayer. Our toilet is right next to the tub, and with a potty-pail type bucket on the toilet, the shower sprayer would reach over perfectly! This would save me a lot of money, solve the nagging worry about possible sprayer leaks, and lets me rinse the diapers with hot or cold water. Perfect!
Now all I needed was the sprayer bucket. The bucket seemed easy enough to make, so I drew up some quick plans based off of the
Potty Pail and this
DIY version. Then I headed to the hardware store to do some hunting. I love the creative process of trying to solve a problem, but I've had more than a few men look at me funny as I try to explain what I am looking for at the hardware store. (Luckily DH knows better than to offer any help.) This time I just wandered the isles with a general list of things-to-look-for, and after the search I ended up with:
- 5gl Bucket
- Bucket Lid
- 2" Peg Board Hooks, four pack
- 10" Peg Board Hook
- Pack of 3/4" Rubber Chair Leg Tips
(You can find a full supplies list is at the end of this post!)
Putting it all together was really easy. I started with the bucket base - the part that would hold the bucket stable on the toilet. I like multi-taskers, so I had the lid double as the bucket base. I used a washable marker to trace the inside of the toilet seat onto the lid, and then I used strong tape to temporarily stick the chair-leg-tips to the underside of the lid (
strong tape- you don't want to fish these thing out of the toilet). I positioned them so that they would hold the lid centered on the seat.
I screwed the leg-tips on to the lid with four little screws (I would suggest 3/8" long screws, but that's just a guess.). Double checking the positioning on the toilet seat between putting each one on and making adjustments as needed.
After that was done I headed to the garage, and had Dh use a box cutter to cut a hole in the center of the lid. (I could have done it ladies; but if you've got a pair of big, strong arms around the house, why not use them?)
That finished the lid/base, and we moved on to the bucket. I put black, washable paint on the peg hooks and used them to mark where we wanted to drill the holes.
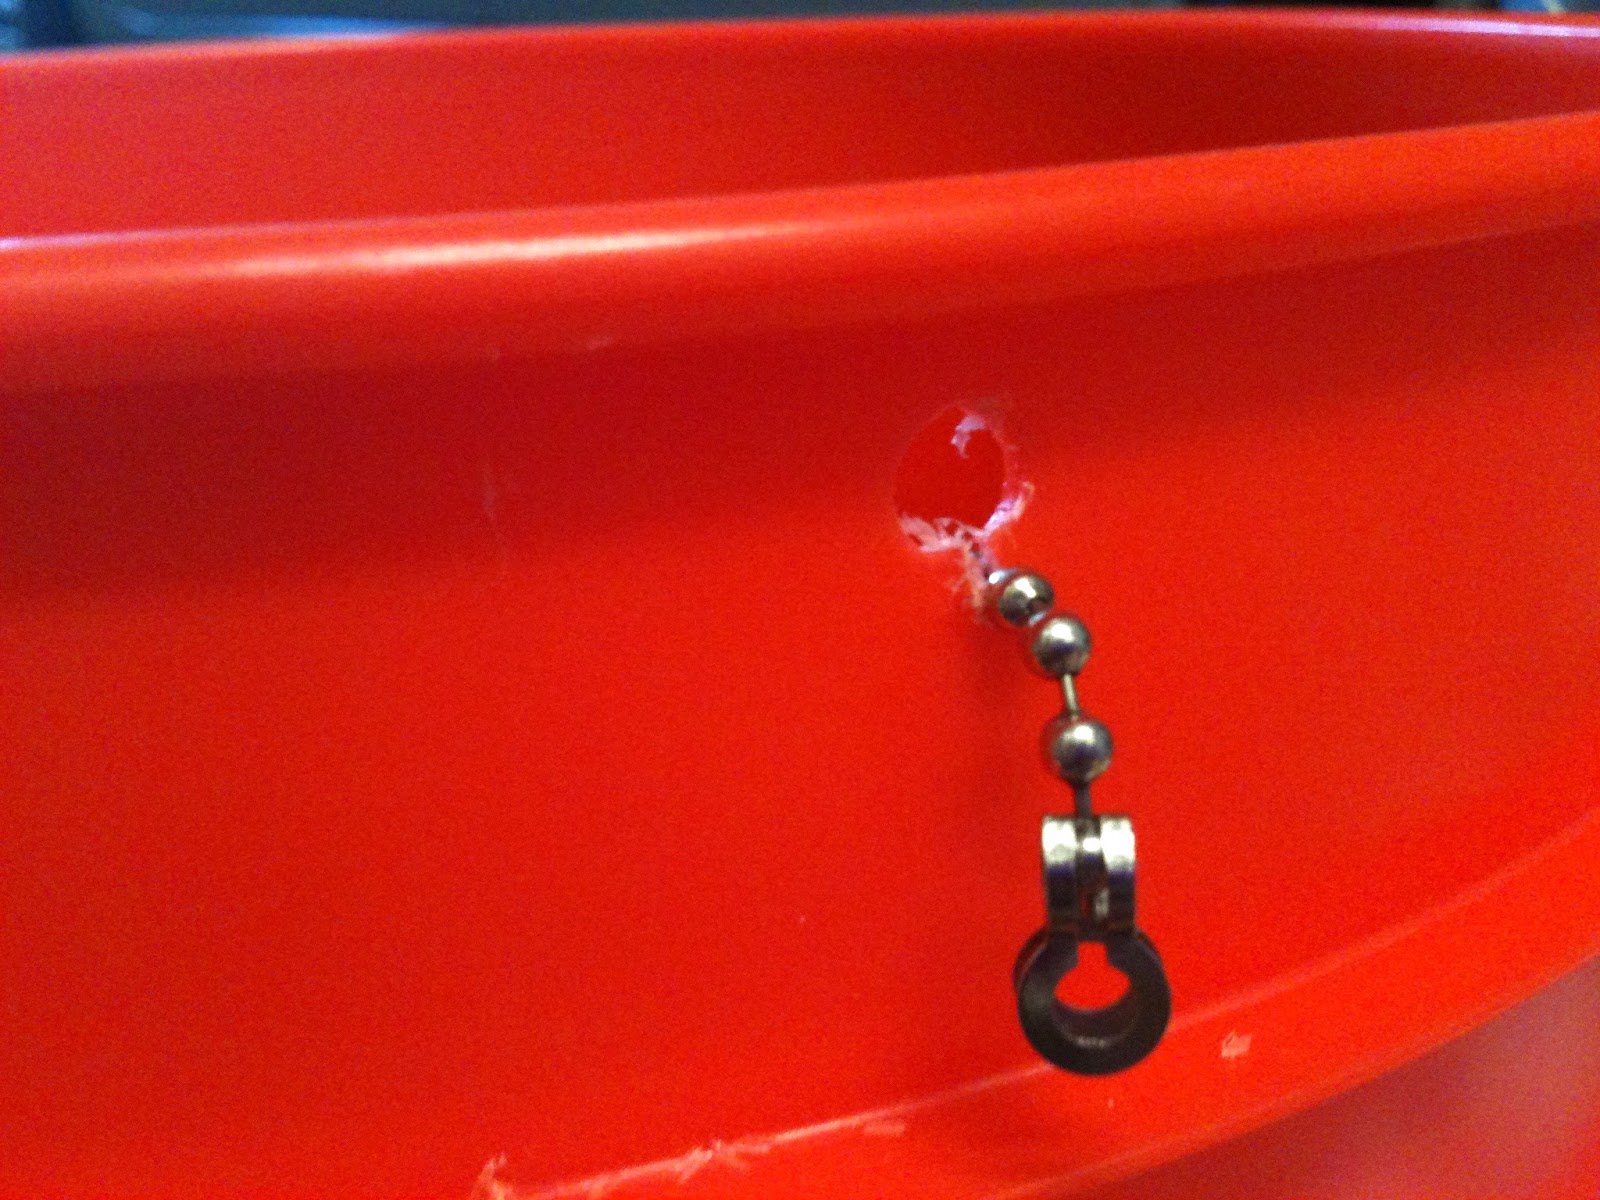
Dh drilled the holes for me, making them just big enough so that they held the peg hooks firmly. Then we added a hole-plus-notch to hold the plug chain. The plug is optional, but it's nice if you want to soak things in the bucket occasionally.
I am spoiled to have so many handsome helpers!
Our plug was the same size as the little ring on the bottom of the bucket, so I ask Dh to cut it out with the box cutter too. A large round drill bit/cutter would have been better. The box cutter does not make a perfectly round hole, so it leaked a little, but I was too impatient to take Dh's advice on that. I figured we could fix it later, if the bucket worked.
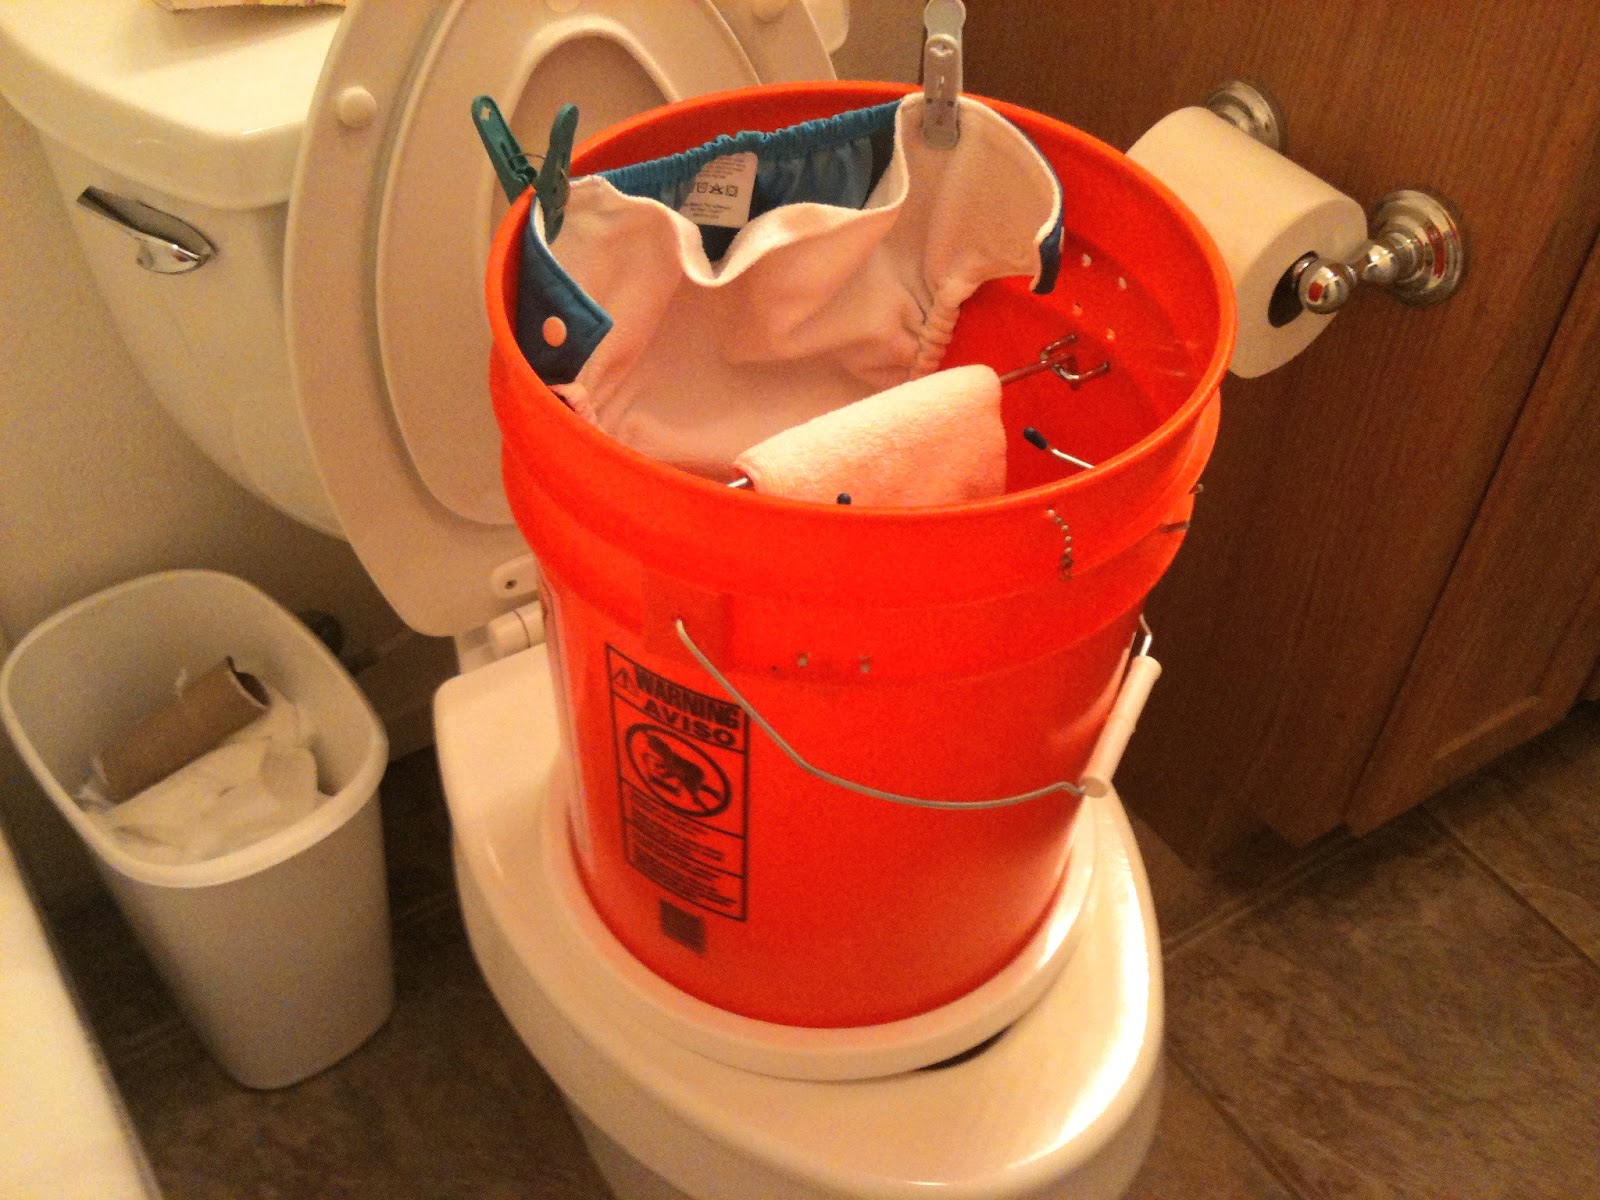
All finished the bucket looked like this.
I kept all the holes to ones side of the handle, so that I could dump water out of the bucket if needed. I also had three sets of holes for the long 10" hook, so I could move it to different heights.
Here are some action shots:
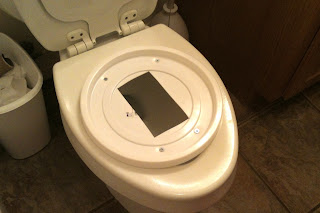 |
| Base/Lid on the toilet |
 |
| Sprayer Bucket set up with toddler size test diaper |
 |
| Sprayer from the shower |
 |
| It works PERFECT!! |
The bucket works perfect, and the lid/base fits on top between uses. It stores in the tub pretty easily, but another option would be to buy an extra lid for it to sit on as a drip tray.
The supplies list for the finished project was:
- 5gl Bucket -$3
- Bucket Lid -$2
- 2" Peg Board Hooks, four pack -$2
- 10" Peg Board Hook -$1
- Pack of 3/4" Rubber Chair Leg Tips -$2
- 2" Drain Stopper -Already had, but would have cost $4
- Tape, Black Paint, and a Marker
- Four Little Screws (3/8"?)
- Box Cutter
- Drill
Assembly was really fast, about two hours including kid interruptions, and total cost was $10!
We are all set for cloth diapering the new baby, and maybe some for PT too, now that it is so easy.